Category Archives: Raspberry Pi

HomeAssistant + Arduino

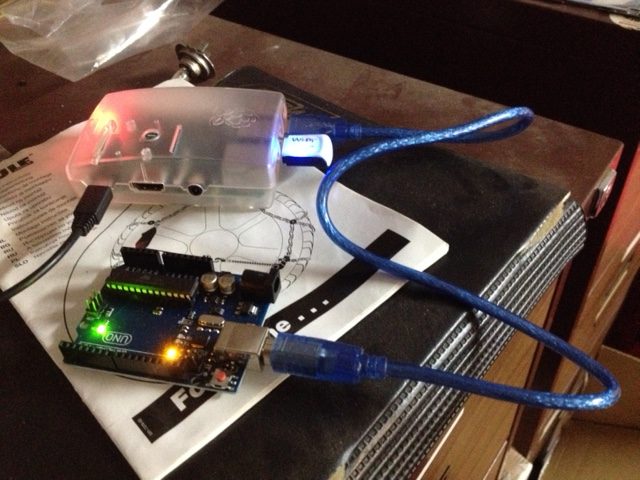
OK, HomeAssistant runs on RaspberryPi, but the RPi only has digital in/out, but what if I want to read analog values from sensors? One solution appears to be to use an Arduino, since this is the sort of thing they do well. However, finding details of how to do this seems a bit sketchy. I could use I2C, but that seems a bit tricky. I did read that I can use USB, which is convenient because that will also give me power for the Arduino. To use an Arduino as an add-on board for the RPi, I had read about something called Firmata, which loads as a sketch running on the Arduino. This is easy at the Arduino end, as it is just one of the examples pre-installed, upload and it’s ready to go.

I set up the configuration in HomeAssistant and immediately got a whole heap of errors, mostly referring to needing PyMata 2.14. Now PyMata is a client library that allows Python to control the Arduino. Obviously not part of the standard RPi/Hassbian image. After a bit of messing around here’s what I managed to do:

  1. Plug the Arduino into your computer, load up the IDE and upload the StandardFirmata sketch (found in the Examples submenu)
  2. Plug the Arduino into a USB port on the RPi. Log into the RPi using SSH
  3. At the command line, run:
    sudo pip3 install pymata
  4. If you download the examples from the GitHub repository, you should be able to call the blink sketch to verify that all is working. It should flash the LED 10 times, and you should see the process running in your terminal session counting down. (Note that my UNO clone is connected at ‘/dev/ttyACM0’, so the script works as is.
  5. Add the following entries to your configuration.yaml script and save it:
    arduino:
      port: /dev/ttyACM0
    
    switch:
      platform: arduino
      pins:
        13:
          name: LED
  6. Restart HomeAssistant
  7. The LED should show up as another switch in your dashboard, and turning it on should light the pin 13 LED on the Arduino
HomeAssistant dashboard with Firmata switch
LED on pin 13 of Arduino controlled through HA using Firmata

Note that it appears you can only read analog input pins, and switch digital output pins through this interface. No PWM, and I suppose if you need to read digital inputs then you can do that directly on the RPi.

More info at:


HomeAssistant

Thought it was time to step up the home automation effort, so a mention of HomeAssistant on a blog had me interested. So now the RaspberryPi is running some new software and I’ve been tinkering with this seeing what it can do. There’s not too many things in the house that are ‘smart’, but I can turn the TV off and control a WeMo switch. Much of the built-in functionality is impressive, so triggers for sunset or time let one test how it works. Integration with my phone also lets it track location and use geofencing for triggers also.

I’d be interested to see what can be done once I can integrate with other systems in the house, such as the alarm system, thermostat or pool controllers. Being open-source and open, there’s plenty of scope to ‘roll-your-own’ to meet individual needs.

Here’s a useful article on using the Hass.io version of HomeAssistant. Worth a look.

We have vision!

I bought a Raspberry Pi camera to go with the RPi 3 for the school project. The eventual intention is to put it on our tank robot so we can see what it is seeing.

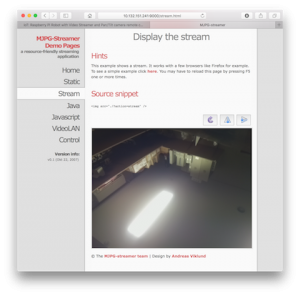
Following on from the previous tutorial IoT: Raspberry Pi Robot with Video Streamer and Pan/Tilt camera remote control over internet I installed streaming software, plugged in the camera and crossed my fingers. Loading the page showed some promise except I’d turned the lights off in the server room when I went away, so I had a square of black. Back to the server room, then back to my computer to find I was looking at the roof of the server room.

It works!

First view from the pi camera. The server room ceiling, not the most exciting view.

New Raspberry Pi 3 setup

This is the second Raspberry Pi I’ve bought, this one is for school projects. The really neat feature is that it has built-in WiFi.

  1. Download NOOBS and copy onto a MicroSD card
  2. Put in the MicroSD card and boot the RPi, then run the installer
  3. After a while, it restarts and you get the desktop. At this point it was easy just to join the home network and we’re done to this point
  4. At school, we set up a fixed IP address on a hidden wireless network, and used the MAC address to secure access to the network
  5. Proxy settings needed to be added
  6. Now, to run some updates. First apt-get update, then apt-upgrade
  7. Install vncserver so we can connect remotely using Chicken of the VNC

Now it’s time to tackle some specific jobs we need for projects.

  1. I used this article IoT: Raspberry Pi Robot with Video Streamer and Pan/Tilt camera remote control over internet to install lighttpd so now we have a simple web server running on the Pi . I wrote a simple page in Nano to test that it works

Raspberry Pi!

So it’s been busy, and school is just about to go back. I did find time to try out my Christmas present so I opened up the kit, plugged in the SD card and WiPi adaptor, hooked up peripherals that normally are hooked up to the Mac Mini, plugged in the power and we’re up and running. A few clicks and we’ve joined the network and posting a new item on this blog!