Weather station update

Realised this project has been running almost 10 years now, and gone through several iterations. The main improvement is that it is integrated with my Home Assistant system.

Latest version of the weather station receiver.

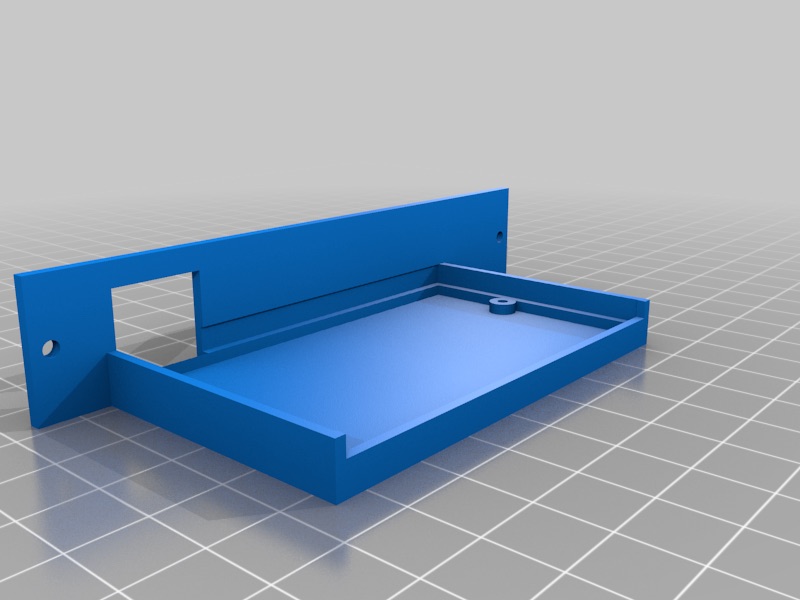
Note that in the process it has gone back to a breadboard, so far from a finished project yet! The circuit operates as such:

  • RF receiver module running at 433 MHz receives the data pulse from the rooftop sensors
  • Arduino Nano decodes the sensor data into meaningful values
  • Data is converted to JSON and transmitted via serial to ESP8266, using level shifter to allow 5V Arduino output to input to ESP which expects 3.3V levels
  • ESP8266 receives JSON packet and then passes this via MQTT to the Home Assistant over WiFi
  • Individual sensor data displayed on HA page
Home Assistant data display

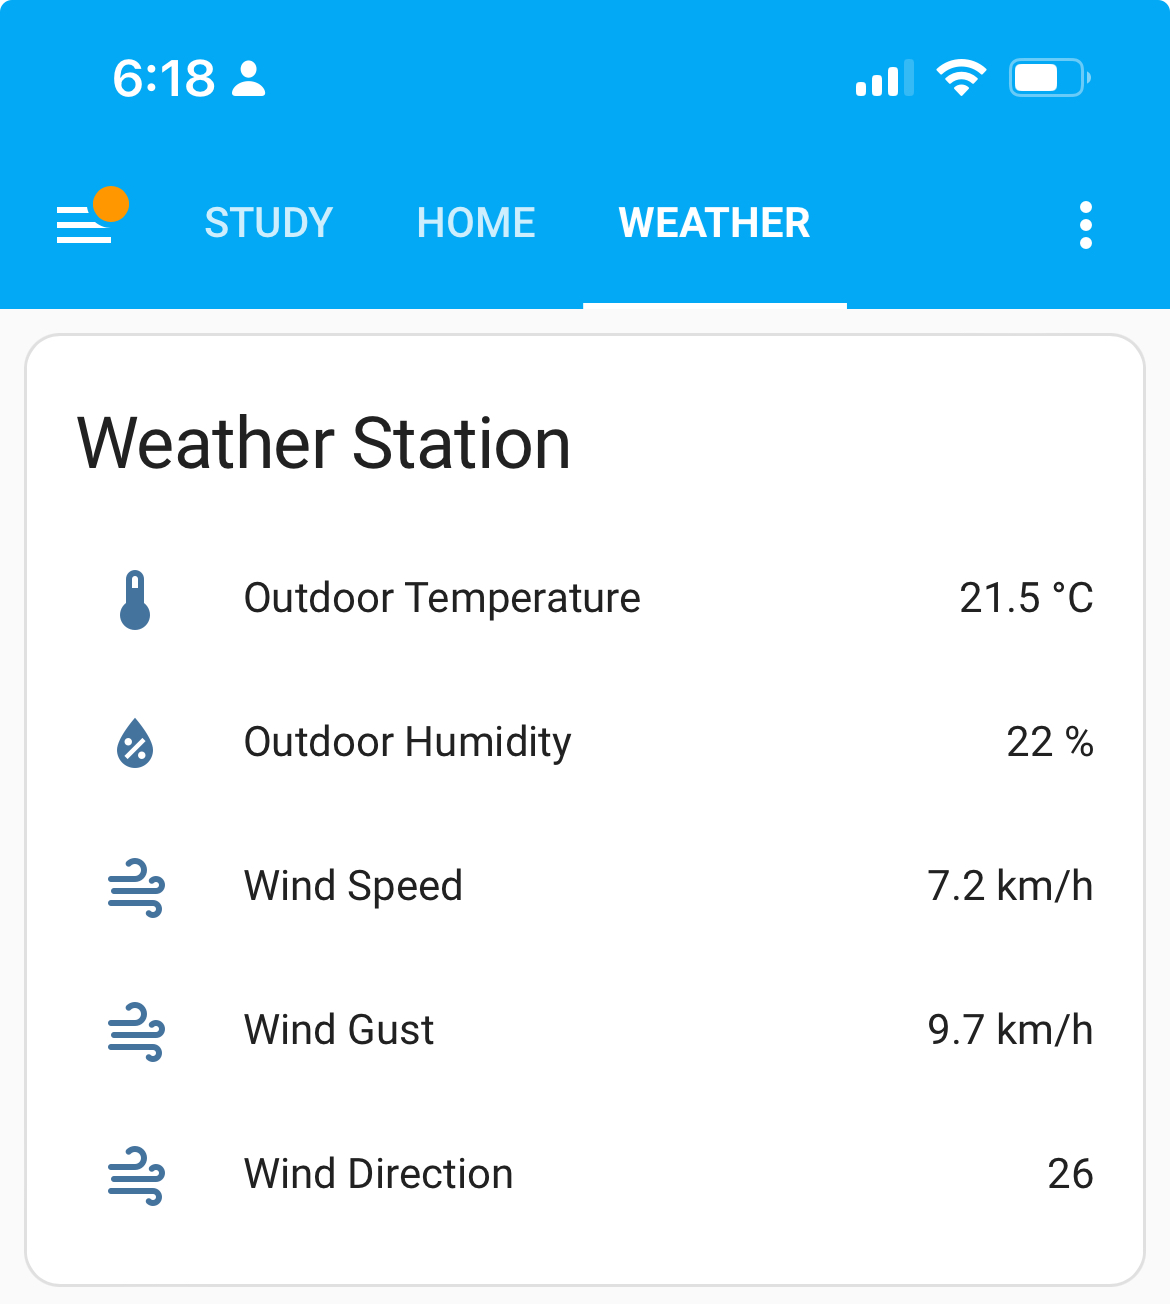
As before, because this is intercepting data from outside sensor, it only gives me outside temperature and humidity, wind speed and direction. (Note direction is still an arbitrary number, must figure out how to convert this to meaningful compass direction one day). This is supplemented by separate ESP boards inside the home sending their temperature and humidity data via the ESPHome integration over WiFi.

During the last week it stopped receiving data from the rooftop unit, and I suspected perhaps this time it had finally packed it in after almost a decade of use. The fact that neither the console or my circuit were reporting data would suggest an issue with the transmitter. Previously I have had to replace the Alkaline rechargeable AA cells it uses, which are not the easiest things to find these days. The cockatoos have also had some fun with it also, with only two of three anemometer cups surviving and some of the wires have been chewed but still seem to be working.

So I climbed up on the ladder to get on the roof, pulled down the transmitter to find it is still working fine. Recalled this has happened before, so I pulled batteries from the wall mounted console to restart it and it picked up the transmitter straight away. Which means of course I have to set the date and time again, no memory backup 🙁

This leaves the question of why my receiver was still not working. Plugging into the Arduino IDE let me check data being received. The ESP was connecting to WiFi, but not receiving from the Arduino, although it was showing data transmission on status lights. On debugging it, found that the transmitter ID code had shifted, which seems to happen from time to time, but I don’t know why. So, what seems to happen is, transmitter ID changes, base station console doesn’t notice and keeps trying to listen to previous ID. Meanwhile, my circuit is hardcoded for the ID. Otherwise it tends to pick up spurious transmissions from other devices, I would expect these could be air conditioner remotes, garage door remotes, etc all of which are using 433MHz RF band.

So restarting the base station made it listen for a new transmitter ID, and I had to update my code for the new ID before it would start reporting the data! I can’t think of an easy way to make this happen automatically, but at least next time I’m going to know what to try before getting up on the roof again.

Macintosh SE reboot

Amongst a collection of ancient computer gear, I have my Mac SE which was my first Mac, following on from the Apple IIe and IIgs. I bought this in about 1987, and it served well for many years, including some tentative steps to becoming a programmer. Originally bought as a twin floppy with 1MB RAM, then updated to 4MB, I had a whopping 67MB Rodime SCSI hard drive installed for an equally whopping price. The third party update put the drive inside whilst leaving both floppy drives installed, unlike the standard Apple configuration which replaced one floppy with the internal drive.

Many years later, the internal drive stopped working meaning it was of limited use, but by then I had moved onto a Mac IIsi. Since then it was stored, with the hard drive removed, and some attempts to replace it with a spare one pulled from another Mac. I also removed one of the floppies which had stopped working at some point.

Fast forward to recent times, and several enterprising individuals have worked out how to build emulators based on microcontrollers using SD cards as storage devices. I obtained a BlueSCSI board. This is the original design, using an STM32 microcontroller, although newer versions also make use of a Raspberry Pi Pico board. It is ironic that the microcontroller boards have more processing power than the Mac they are installed in.

BlueSCSI board
BlueSCSI board (credit: Tom Bl @FB)

The vendor kindly gave me an adaptor header which converts the 50-pin SCSI header into a DB-25 plug so that the board can be plugged straight into the external SCSI port not requiring you to open the case. You copy a disk image for the hard drive to a microSD card, then when the Mac starts up it sees the board as normal HD. Some initial trials established that a) it works well but b) I couldn’t use the System 7 image provided as I had reverted to the original 1MB of RAM.

For software images and articles, a fantastic site is https://www.savagetaylor.com. Here’s a helpful guide, written for a different SCSI emulator board but the software works the same.

Warning: Opening up a compact Mac is not a trivial matter! These were never designed to be user-serviceable and in particular all of the service manuals are very clear on taking precautions to not get blasted by the high voltage charge stored by the CRT. If you don’t know what you are doing, don’t open the case!

Put aside for a few months until the end of the year when I had holiday time to continue. Restored to 4MB of RAM, working well with System 7 disk images. Put aside again whilst I thought about whether I wanted to hide the board inside or just plug into SCSI port. First is better but then you can’t access the SD card to modify software. Second is inconvenient as you have to plug in every time and it gets in the way of the external floppy port too.

Best solution, I found a 3D print for a tray that lets you install into the PDS slot opening on the back whilst still allowing access to the SD card. Opened up again, and a little bit of adjustment and all good! Back to life!

3D printed tray for BlueSCSI board (credit: https://www.thingiverse.com/thing:5358068)

At present, the only way to change software on the computer is either from old disks or modifying the disk image on the SD card. Obviously there is no internet connection to easily download files! Future steps might be to set up an emulator on my modern Mac so I can move files back and forth.

Been a long time …

Just realised that I haven’t posted here in a long time, started a new role at a new school start of 2022 and that has been keeping me busy … in a good way.

Few projects that have been looked at in this time:

  • I did build a finished version of the RGB light controller on strip board, worked quite nicely
  • Lots of Home Assistant experimentation, including an updated receiver for the weather station to post data to HA via MQTT
  • I fixed our pool chlorinator controller, ended up being a dry solder joint, saved myself about $2000 that it would have cost to replace it
  • Brought the Macintosh SE back to life with a BlueSCSI card, this basically replaces a failed SCSI hard drive with a microcontroller and a microSD card (go read the post here).

Almost end of school holidays, which is usually when I have some time to reflect, perhaps there will be another detailed post for one of these projects?